

Copy This Checklist: MLS Photo Rules Agents Can Use in 48–96 Hours
Copy This Checklist: MLS Photo Rules Agents Can Use in 48–96 Hours
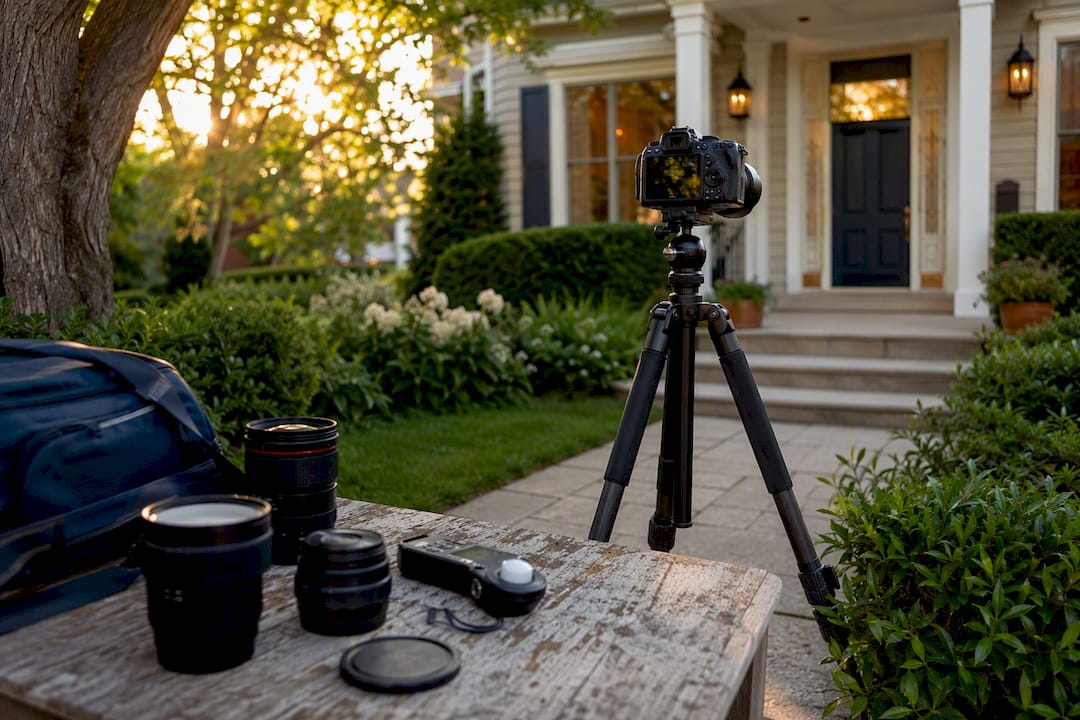
Upload a qualifying exterior photo within your MLS’s deadline, strip out any branding or contact information, and keep signed licenses on hand for anything you didn’t shoot yourself. Most systems give you 48 to 96 hours from listing entry to post at least one image showing a substantial portion of the property’s exterior. Skip that window, add a “Call Jane for a tour!” text overlay, or upload a staged photo without disclosing it, and you’re looking at a citation, a fine, or a listing that gets flagged before it ever reaches a portal.
TL;DR:
- Upload the exterior photo showing a substantial portion of the property within 48 hours to 4 days, depending on your MLS, to avoid citations or listing removal.
- JPEG format with resolution at least 1024×768 pixels is standard, but 2048×1536 pixels offers better portal display; always stay within your MLS’s file size limit, typically 10 to 15 MB.
- All staging, virtual modifications, or materially altered images must be disclosed with captions or flags to prevent misrepresentation and MLS violations.
- Photos must avoid branding, personal items, or identifiable individuals directly, with extra caution around mirrors, valuables, and license plates to maintain privacy and safety.
- Always retain proof of ownership or licensing for submitted photos, including licenses, releases, and original files, as legal liability depends on your representation of ownership rights.
Table of Contents
- Understanding MLS Photo Rules: A Quick Checklist
- Photo Specs: Formats, Resolution, and File Size Limits
- What You Can and Can’t Show in Listing Photos
- Who Owns the Photo, and Who’s Liable if You Don’t
- Penalties, Citations, and a Compliance Workflow That Actually Works
- A Pre-Publish Checklist for Every Listing
- How AgentWrite Supports Compliant Listing Workflows
- Photo Count Limits and What Happens to Off-Market Listings
- Replacing or Updating Photos After You’ve Already Uploaded
- How Photo Rules Differ Across Major MLS Systems
- Drone and Aerial Photography Rules for Listings
- Standard Photo Dimensions and Aspect Ratios for MLS
- What Counts as Acceptable Photo Content
- Balancing Great Marketing With Strict MLS Compliance
- A Faster Way to Handle the Paperwork Around Your Photos
- Sources
- FAQ
Understanding MLS Photo Rules: A Quick Checklist
Every MLS writes its own rulebook, but the core requirements repeat across systems with only minor variation in timing and thresholds.
- Upload deadline: Ranges from 48 hours to four days depending on the MLS. CRMLS requires it within two days, and ARMLS allows four.
- Exterior photo mandate: At least one image must show a substantial portion of the exterior, and it typically has to stay in the listing through every status change.
- No branding or contact info: Signs, phone numbers, QR codes, and agent logos are prohibited in the photo itself.
- Staging disclosure: Virtually staged or materially altered images need a caption note or a checkbox flag.
- License documentation: Keep proof of ownership or written permission for any photo you didn’t take yourself.
Miss any one of these and you risk an automatic hide, a citation, or a fine, depending on the offense and your specific MLS.
Photo Specs: Formats, Resolution, and File Size Limits
There’s no single universal file spec, but the baselines converge enough that you can build one export preset and stay compliant almost everywhere. JPEG is the default format nearly every MLS accepts without question; some allow PNG or TIFF, but JPEG remains the safest choice for uploads that need to move fast through multiple systems.
On resolution, treat 1024×768 pixels as the floor and 2048×1536 as your real target. That higher resolution holds up better on portal zoom features and doesn’t get rejected by systems with stricter minimums. File-size caps vary more than resolution does: ARMLS cites a 15 MB ceiling as one example, while other systems cap lower. Export at the largest size your MLS allows, and always work in sRGB color space so images don’t shift tone when they hit a browser.
| Spec | Common Baseline | Notes |
|---|---|---|
| File format | JPEG | Some MLSs accept PNG or TIFF |
| Minimum resolution | 1024×768 px | Industry practical floor |
| Recommended resolution | 2048×1536 px | Better portal display quality |
| File size limit | 10 to 15 MB | Varies by MLS, check local rules |
| Color space | sRGB | Prevents color shifts on upload |
Strip sensitive EXIF metadata (GPS tags, camera serial numbers) before you upload, especially on drone files, and keep your unedited originals in a dated folder in case a compliance question comes up later.
What You Can and Can’t Show in Listing Photos
MLS photo guidelines police content almost as tightly as they police timing. The line usually comes down to accuracy: does the image represent the property honestly, or does it dress it up in a way that misleads a buyer?
Virtual staging sits in a gray zone that trips up a lot of agents. Most MLSs, including CRMLS, allow it, but only with clear disclosure in the caption or a dedicated field. What they won’t tolerate is an edit that changes the perceived size of a room, removes structural flaws, or fabricates features that don’t exist. Exposure correction, HDR blending, and straightening a crooked horizon line are all fair game; digitally adding a pool or knocking down a wall is not.
People and pets can appear incidentally, but they can’t be the point of the photo. A blurry figure walking a dog in the background of a yard shot is fine. A posed lifestyle photo with an identifiable person smiling on the porch usually isn’t, and neither is a close-up of a family pet that reads more like a marketing prop than an accurate depiction of the home.
- No for-sale signs, yard signs, or sandwich boards in frame.
- No agent headshots, logos, or QR codes layered onto the image.
- No personal items that identify current occupants, like mail with an address or a family photo on a wall.
- Off-property shots (a nearby park, a marina, a downtown strip) are usually acceptable only when captioned to make clear they aren’t part of the property.
Pro Tip: Shoot a clean “before” version of every room even if you plan to virtually stage it. If a buyer complains that a room looked bigger online, you want the untouched original ready to prove nothing was distorted.
Who Owns the Photo, and Who’s Liable if You Don’t
Submitting a photo to an MLS isn’t a neutral act. You’re making a representation that you own the image or have the legal right to distribute it, and that representation carries real liability if it’s wrong.
- You warrant ownership or license on submission. Most systems require this implicitly through their rules of participation, and some, like those referencing the C.A.R. Photograph Indemnification Agreement, require it explicitly in writing.
- Web images are off-limits. Pulling a photo from Google, Bing, or a builder’s marketing site without written permission is copyright infringement the moment it hits MLS distribution, since that distribution is commercial in nature.
- Photographer contracts need MLS-specific language. A lot of standard photography agreements grant usage rights that don’t extend to MLS syndication or third-party portals. Confirm the agreement includes perpetual, transferable rights before you rely on it.
- Renderings and parcel maps are acceptable substitutes for vacant land or new construction when a real photo isn’t available, but satellite images pulled from mapping services generally aren’t, unless you have documented permission.
Keep every license, release, and photographer invoice in the listing file. If a compliance question ever comes up, “I assumed it was fine” isn’t a defense.
Penalties, Citations, and a Compliance Workflow That Actually Works
Enforcement isn’t theoretical. Stellar MLS notes that branding violations can trigger fines immediately, and several MLSs automatically hide listing photos from public view the moment a property goes off-market, regardless of intent.
- Get cited, fix it fast. Most systems give you a short remediation window; resubmit corrected media before it escalates to a repeat-offense fine.
- Missed the exterior deadline? Upload immediately. A CRMLS-style two-day window that lapses without a qualifying image is one of the most common citation triggers.
- No usable exterior shot yet? Use your MLS’s “No Photo per Seller” or similar exemption option rather than leaving the listing non-compliant.
- Document everything. Save originals, licenses, and upload timestamps. Poor recordkeeping turns a minor fix into a drawn-out dispute, and repeated violations can suppress your listing’s syndication to portals.
A Pre-Publish Checklist for Every Listing
Run this before you hit submit, not after a citation lands in your inbox.
- Confirm your MLS’s primary-photo rule for that property type, then shoot the exterior or lot image first so you’re never scrambling near the deadline.
- Export the primary image as a high-quality JPEG, set it in the primary slot, and confirm your upload timestamp falls inside the required window.
- Caption every staged or materially edited photo with disclosure language in the field your MLS provides for it.
- Attach license documentation for any third-party image and scrub branding, text overlays, or contact info from every file.
- Run a final spec check: dimensions at or above 2048×1536 px where possible, correct file type, and file size under your MLS’s cap.
Pro Tip: Build a one-page upload sheet per MLS you work in, listing the primary-photo rule, deadline, file-size cap, photo count limit, and disclosure fields. Five minutes of reference beats a fine every time.
How AgentWrite Supports Compliant Listing Workflows
Photo rules are only half the compliance picture. The remarks, captions, and disclosure language attached to those photos carry their own Fair Housing and accuracy risk. Agentwrite flags potentially problematic phrasing before it goes live and helps agents draft consistent disclosure text for virtually staged images, so the caption matches what your MLS actually requires instead of a generic placeholder copied from the last listing. That consistency matters when you’re juggling multiple MLS systems with slightly different disclosure fields, since a mismatched caption is its own kind of compliance gap, separate from the image itself.
Photo Count Limits and What Happens to Off-Market Listings
Photo limits vary more than most agents expect. Bright MLS allows up to 150 images per listing, which is generous enough that most agents never bump against it. Other systems cap lower, so check your specific MLS before assuming you have unlimited room to showcase every angle of a kitchen remodel.
The bigger surprise for a lot of agents is what happens to those photos once a listing changes status. When a property goes off-market, whether it’s sold, expired, or withdrawn, many MLSs automatically restrict or hide the photo gallery from public-facing display. The listing data may remain in the system for agent-side records, but the visual content that once appeared on Zillow, Realtor.com, or a brokerage site can disappear from public view almost instantly.
That automatic behavior isn’t a bug. It protects sellers from having interior photos of their now-private home circulating indefinitely, and it protects the MLS from disputes about outdated marketing material. But it does mean you should archive your own copies of every photo set before a listing closes, since you’ll lose easy access to the public-facing gallery the moment the status flips.
If you’re relisting a property that previously went off-market, don’t assume the old photos carry over cleanly. Some systems require a fresh upload to satisfy the exterior-photo deadline again, treating a relist similarly to a brand-new entry.
Replacing or Updating Photos After You’ve Already Uploaded
Listings evolve. A seller finishes a kitchen renovation, staging changes, or you simply get better light for a reshoot. Updating photos after the initial upload is routine, but a few rules still apply.
First, the required exterior or primary image still has to remain in the listing at all times for most MLSs, so don’t delete it mid-swap without immediately replacing it with a qualifying substitute. Pulling every photo down for even a short window, intending to re-upload a fresh batch later, can put the listing out of compliance the moment a compliance check runs.
Second, if you’re replacing a staged photo with an unstaged one (or vice versa), update the disclosure caption at the same time. An old disclosure tag sitting on a photo that’s been swapped out creates a mismatch that looks careless even when it’s just an oversight.
Third, most systems don’t restart your upload-deadline clock when you add new photos to an already-compliant listing. The clock applies to the initial qualifying exterior image, not to every subsequent update. That said, if you’re correcting a violation, like removing a branded overlay, treat the resubmission with the same urgency as a first-time deadline, since a slow fix on a known citation tends to draw more scrutiny than the original mistake.
Finally, keep a version history if your MLS platform supports it. Being able to show when a photo was swapped and why can matter if a dispute ever surfaces about what buyers saw and when.
How Photo Rules Differ Across Major MLS Systems
There’s no single national MLS photo standard in the United States, which is exactly why agents working across county lines or multiple MLS memberships need to check each system individually rather than assuming rules carry over.
CRMLS sets a tight two-day window for the required exterior image and keeps that image mandatory through every status change, with narrow exemptions. Bright MLS, covering a large mid-Atlantic footprint, gives agents 72 hours and caps total photos at 150, while also limiting media strictly to images of the subject property and its immediate neighborhood. ARMLS in Arizona extends the window to four days for most residential listings and publishes specific format and file-size guidance, including a 15 MB example cap. Stellar MLS, serving much of Florida, emphasizes accuracy over strict timing language, explicitly prohibiting undisclosed virtual staging and identifiable-person lifestyle shots, and it automatically restricts photo visibility once a listing leaves active status.
SDMLS in San Diego follows a similar structural pattern to other California-based systems tied to C.A.R. compliance language, reinforcing the licensing and disclosure expectations found in CRMLS’s rules.
The practical takeaway: build your compliance habits around your primary MLS’s specific deadline and count limits, then double-check each additional system you submit to rather than assuming a 72-hour rule applies everywhere. A workflow tuned for one system can quietly violate another.
Drone and Aerial Photography Rules for Listings
Aerial photography has become standard for larger properties, but it comes with its own layer of rules on top of standard MLS photo requirements.
Most MLSs allow drone photography as long as the images meet the same content standards as ground-level shots: no branding, no identifiable people, and accurate representation of the property and its boundaries. Where drone images get flagged more often is scope. A wide aerial shot that captures a significant portion of a neighbor’s yard, pool, or backyard activity can raise privacy concerns that a standard exterior photo wouldn’t. Crop tight to the subject property and its immediate lot lines.
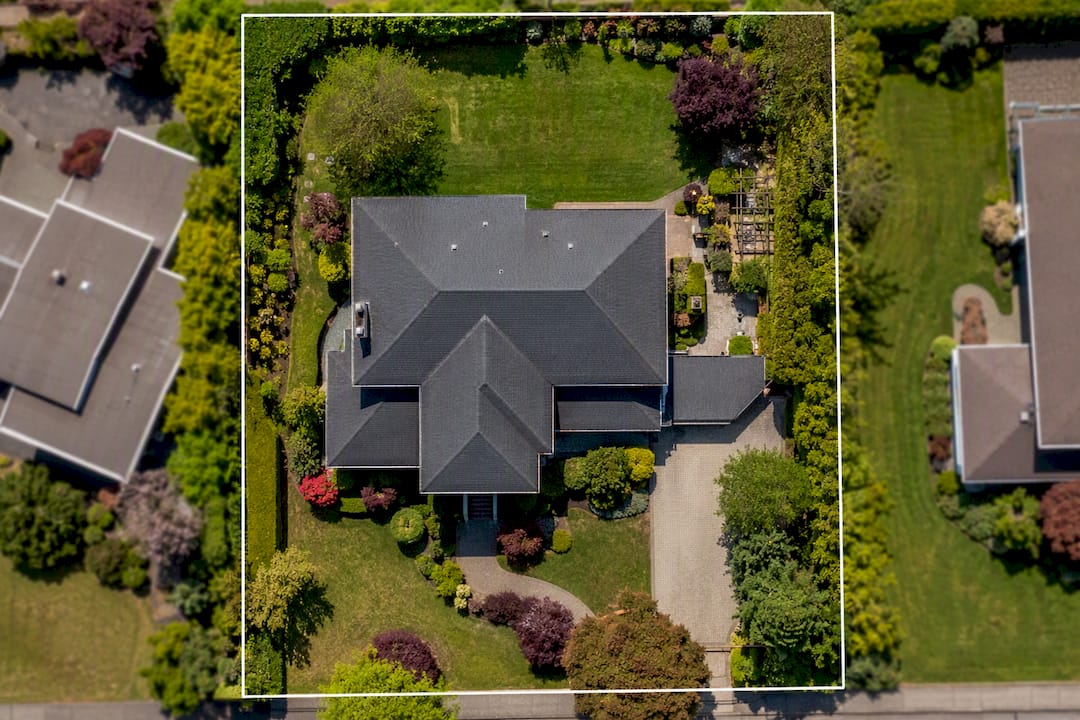
Legal use of a drone also depends on more than MLS rules. Commercial drone operation in the United States requires a Part 107 remote pilot certificate from the Federal Aviation Administration, and airspace restrictions apply near airports and certain municipal boundaries regardless of what your MLS permits. An agent flying a drone without the proper certification, or hiring an uncertified operator, is taking on liability that has nothing to do with photo compliance and everything to do with federal aviation law.
Aerial shots showing the exterior can often satisfy the mandatory primary-photo requirement, provided the image clearly shows a substantial portion of the structure rather than just a distant rooftop view. If you’re unsure whether a specific aerial angle qualifies, check with your MLS’s compliance desk before relying on it as your primary image, since a rejected primary photo after your upload deadline has already passed puts you right back in citation territory.
Standard Photo Dimensions and Aspect Ratios for MLS
Dimensions and aspect ratio matter for two reasons: MLS system requirements, and how the image actually displays across the portals that syndicate your listing.
On the dimension side, treat 1024×768 pixels as your absolute floor and 2048×1536 as the target that holds up well on both desktop and mobile, especially when a buyer zooms in on a listing photo, which happens more often on kitchens and bathrooms than any other room type. That 4:3 aspect ratio remains the most widely accepted standard across MLS systems and syndication partners, largely because it matches how most real estate cameras and wide-angle lenses are calibrated by default.
Some newer portal displays favor a 16:9 widescreen crop for hero images, but cropping a 4:3 original down to 16:9 after the fact is safer than shooting natively in widescreen, since it gives you the flexibility to satisfy either format from a single capture. Vertical or portrait-orientation images are typically discouraged for primary listing photos because they display poorly in the horizontal thumbnail grids most MLS interfaces and portals use.
Consistency across your gallery matters more than most agents realize. A listing with photos in three different aspect ratios looks disorganized, and some MLS quality-review processes will flag a wildly inconsistent gallery even if no single image violates a hard rule. Set your camera or editing software to export a single consistent aspect ratio for the whole shoot, then only deviate deliberately for a genuinely wide feature like a panoramic view.
What Counts as Acceptable Photo Content
Beyond staging and branding rules, MLS systems police a handful of content categories that trip up agents who are otherwise following the technical specs correctly.
Personal items are the most common issue. Family photos on a mantel, mail with a visible address, prescription bottles in a bathroom shot, or a whiteboard with a child’s school schedule all create privacy exposure for the seller and, in some cases, safety risk. Before any shoot, walk the property and clear surfaces of anything that identifies the occupants or reveals sensitive information.

Vehicles with visible license plates parked in a driveway shot are a smaller but real concern for the same privacy reasons. A quick blur or crop solves it without much effort.
Interior shots showing valuables in plain view, jewelry, firearms, cash, or expensive electronics, create a security risk that has nothing to do with MLS rules directly but matters enormously for the seller’s safety once a listing goes public. Advise sellers to secure these items before any shoot rather than relying on cropping to hide them after the fact.
Bathroom and bedroom photos need particular care around personal items and mirrors, since a mirror can accidentally capture the photographer or another person in the reflection, which can violate the same identifiable-person restrictions that apply to lifestyle shots elsewhere in the gallery.
For further reading on staging and disclosure specifics, TwilightImage’s guide on co-op listing photo strategy covers several of these content edge cases in more depth for multi-unit properties.
Balancing Great Marketing With Strict MLS Compliance
The best listing photos and the most compliant listing photos aren’t in conflict, they’re the same photos done correctly. Over-editing to make a room look bigger or a view look closer doesn’t sell the house faster; it just sets up a buyer complaint or an MLS citation down the line. Every agency should have a written standard operating procedure for media submission, not a mental checklist one person remembers. Compliance-first workflows take a few extra minutes up front and save far more time avoiding fines and resubmissions later.
— Tyler
A Faster Way to Handle the Paperwork Around Your Photos
Getting the photos right is only half the job. The disclosure captions, staging notices, and listing remarks that accompany them carry just as much compliance risk, and writing that language fresh for every property eats time you’d rather spend on showings. Agentwrite generates listing descriptions, MLS remarks, and disclosure phrasing from the property details you already have, and flags potential Fair Housing wording issues before they ever reach your MLS submission.
It stores your preferred disclosure phrasing so you’re not rewriting the same virtual-staging notice from scratch on every listing, which cuts down on the kind of small inconsistencies that draw compliance attention. To be clear, Agentwrite doesn’t set or interpret your MLS’s photo rules. You still need to verify upload deadlines, file specs, and image-count limits directly with your MLS. What it handles is the writing layer around those photos, so your captions and remarks stay accurate and consistent every time. Start a trial and see how much faster your next listing goes from photos to published.
Sources
- Flexmls Compliance FAQs (CRMLS)
- Bright’s policy on images and documents
- All about ARMLS photo rules
- Stellar MLS: Rules & tips for MLS listing photos
- MLS photo requirements: 2026 guide
FAQ
Can I use pictures from other MLS listings?
No. Photos from another agent’s MLS listing are protected by that photographer’s or brokerage’s copyright, and using them without written permission counts as infringement, even after a listing expires.
What size do photos need to be for MLS?
Treat 1024×768 pixels as the practical minimum and 2048×1536 as the stronger working target, but check your specific MLS since file-size caps range from about 10 MB to 15 MB depending on the system.
How many photos are allowed on MLS?
Limits vary by system. Bright MLS allows up to 150 photos per listing, while other MLSs cap lower, so confirm your specific limit before a large shoot.
Can a realtor use another realtor’s photos?
Only with explicit written permission or a transferable license from the photo’s owner. Submitting someone else’s photos without that documentation violates copyright law and most MLS rules of participation.
How long do I have to upload the required exterior photo?
It depends on the MLS: CRMLS requires it within two days, Bright MLS within a few days, and ARMLS within four days of the listing going active.